Most of the cost of a stamped part is set before anyone cuts steel for a die. The print decides how complicated the tool has to be, how much material each part uses, and how hard it will be to hold dimensions run after run.
The numbers below are common starting points from published sheet metal design guides, not hard limits. The right value depends on the material, its thickness and temper, and the die, so check with our engineers before you lock in a design. T means material thickness.
1. Make holes at least as wide as the metal is thick
A punch narrower than the material is thick is weak for the load it has to carry. It wears fast, chips and breaks, and every repair stops the press.
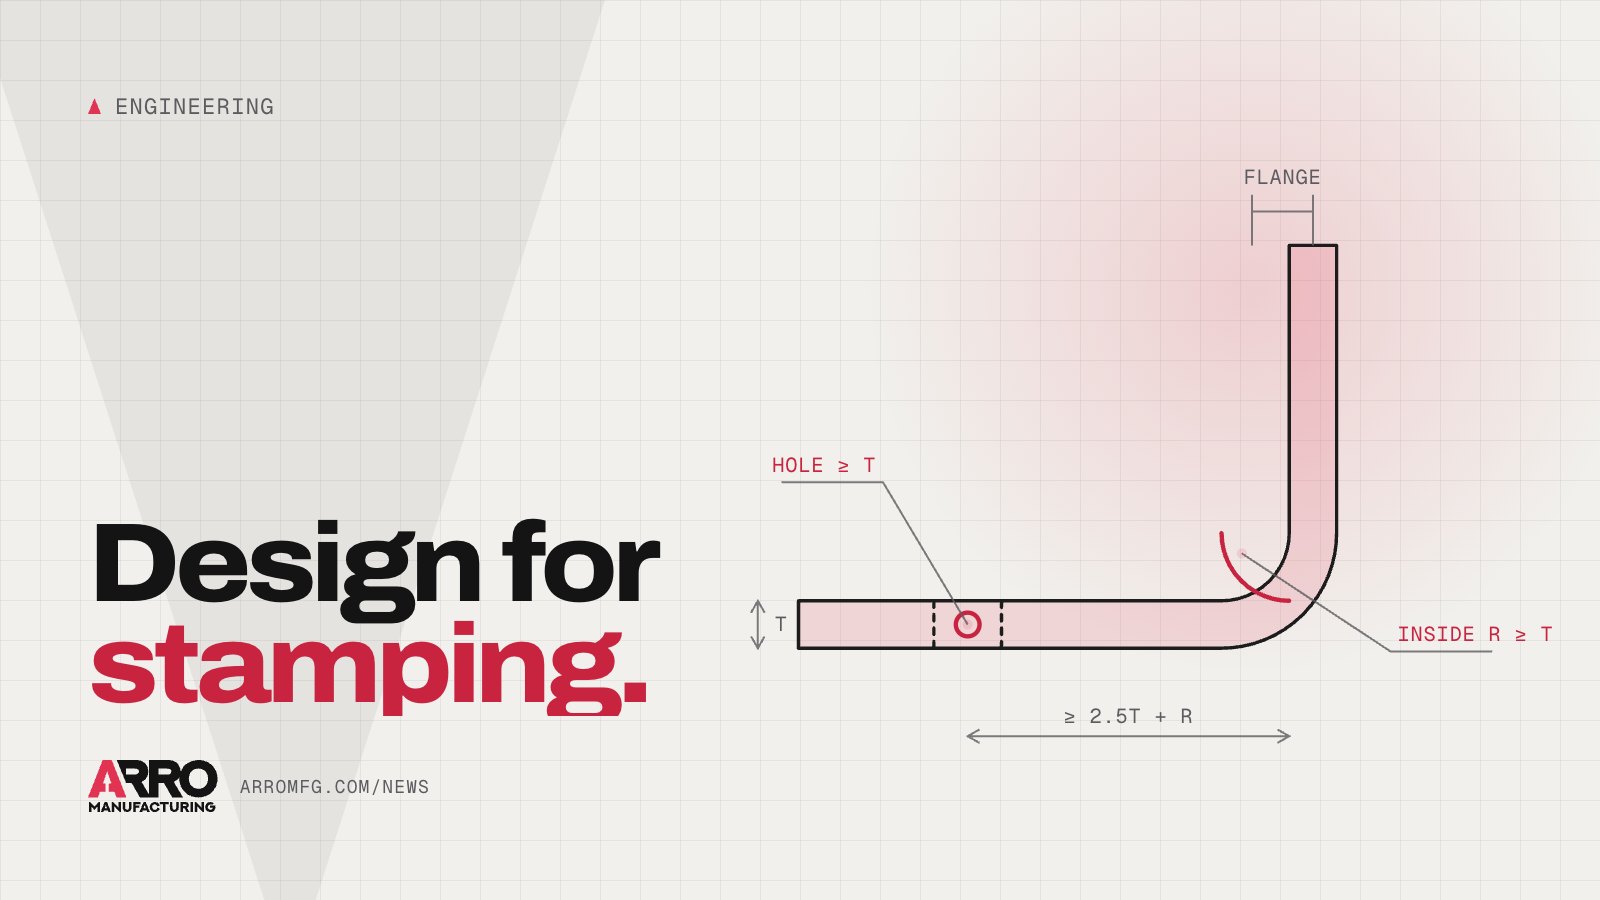
A common starting point is a hole diameter of at least 1T for mild steel. Stronger materials need more. Published guides suggest about 1.2T for ductile aluminum and about 2T for higher-strength stainless steel. Slots should be at least about 1.5T wide. A smaller hole is sometimes possible, but expect more tool maintenance or a secondary operation such as drilling.
2. Keep holes and features away from edges and bends
Pierce too close to an edge and the thin strip between the hole and the edge bulges or tears. Put a hole too close to a bend and the forming pulls it into an oval.
- From an edge: start with at least 2T between a hole or slot and the edge of the part.
- From a bend: start with at least 2.5T plus the inside bend radius between the hole and the bend. Some guides allow 2T plus the radius for small holes, and call for 4T plus the radius for slots.
A hole near a bend can sometimes be pierced after forming, but that adds a station or an operation, so first ask whether the hole can move.
3. Give bends an inside radius of at least 1T, and mind the grain
Bend metal too tight and the outside of the bend cracks. A common starting point is an inside bend radius at least equal to the material thickness. Thicker and harder materials need more, including many stainless grades and some aluminum tempers. The material supplier's data sheet often lists a minimum.
Grain direction matters here. Rolled sheet has a grain that runs in the rolling direction. Bending across the grain allows a tighter radius before the outside surface cracks. Bending along it is more likely to crack. If your part has a tight bend, note it on the drawing, and the die designer can orient the part in the strip so the critical bend runs across the grain.
Also use the same inside radius on every bend where you can, and keep formed legs long enough to form accurately. One widely used guide puts the minimum bend height at 2.5T plus the bend radius.
4. Add bend relief where a bend meets an edge
When a bend stops partway across a part, or runs right up to an edge, the metal at the end of the bend has nowhere to go. It tears or bulges.
A small relief cut at the end of the bend fixes this. A common starting point is a relief at least as wide as the material is thick (some guides call for 2T) and deep enough to clear the bend, often the bend radius plus the thickness. The other option is to move the bend away from the edge by at least the bend radius. Round the outside corners of the blank as well, to at least half the material thickness.
5. Design around one material thickness
A stamped part comes from a single strip of metal, so the coil sets its thickness. You cannot make one wall heavier than another the way you can with a machined part.
If one area needs more strength, add stiffness with geometry instead of thicker material. Flanges, embossed ribs and formed beads stiffen sheet metal and add little to the piece price once built into the die. If the design really needs two thicknesses, it is usually two parts joined by welding or fasteners. Standard thicknesses and common alloys also help, since they are easier to buy.
6. Hold tight tolerances only where they matter
Every tight tolerance costs something: more precise die components, more frequent die maintenance, closer inspection and sometimes a slower run. On the features that make the part work, that cost is worth paying. On the rest of the print, it is not.
- Pick out the features that matter for fit and function, such as mating holes, mounting surfaces and datums, and give them the tight callouts.
- Let everything else follow a general tolerance block suited to stamping.
- Dimension critical holes from a datum on the same flat when you can, since dimensions across a bend vary more with springback.
Tight tolerances belong on the features that make the part work, not on every line of the print.
7. Think about the strip, and look for parts to combine
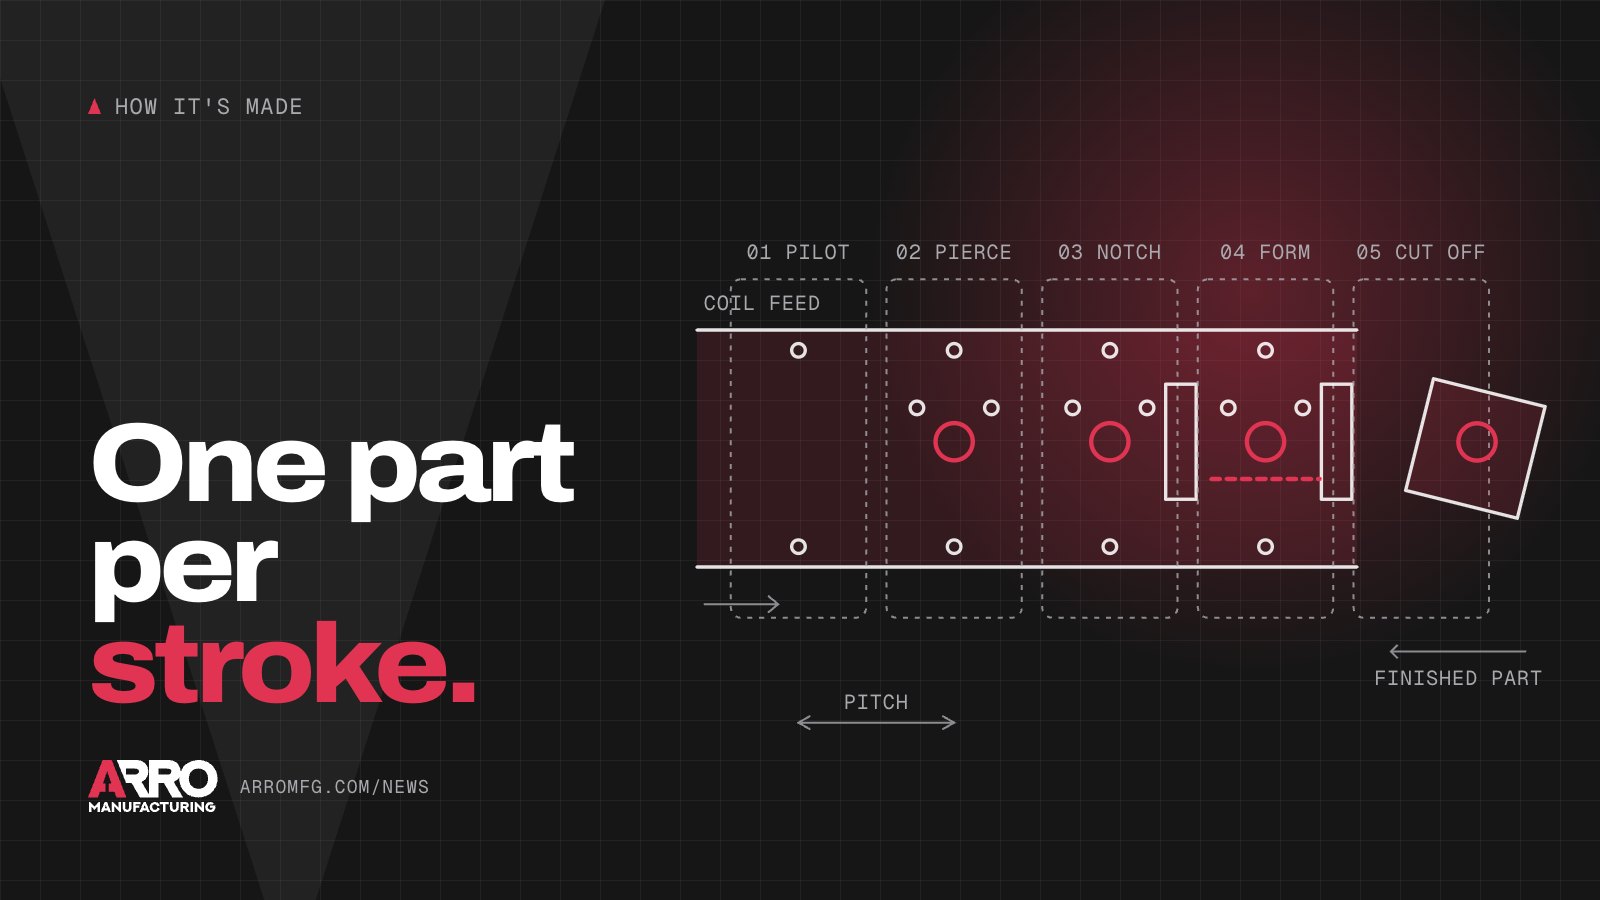
In a progressive die, parts are laid out along a strip of coil, and everything that is not part becomes scrap. On long runs, material is often a large share of the piece price, so the outline matters. Small changes, like squaring off a corner or letting a tab on one part nest into a notch on the next, can pack parts closer together.
Look at the assembly too. Two or three pieces that get welded or bolted together today can sometimes become one stamped part with formed features, which removes fasteners, a joining step and a tolerance stack. The reverse also happens: splitting one difficult part into two simple ones can make both dies less expensive.
At Arro, you own your part design. Our engineers review each print for manufacturability, engineer the tooling and the process, and suggest changes for you to approve. Because we design and build our own dies, that feedback comes from the people who will build and run the tool. Share your drawing with us and we will point out anything that could lower its cost.